Sample text
-
Whatsapp 86-15036103890
-
E-mail gyf15036103890@gmail.com

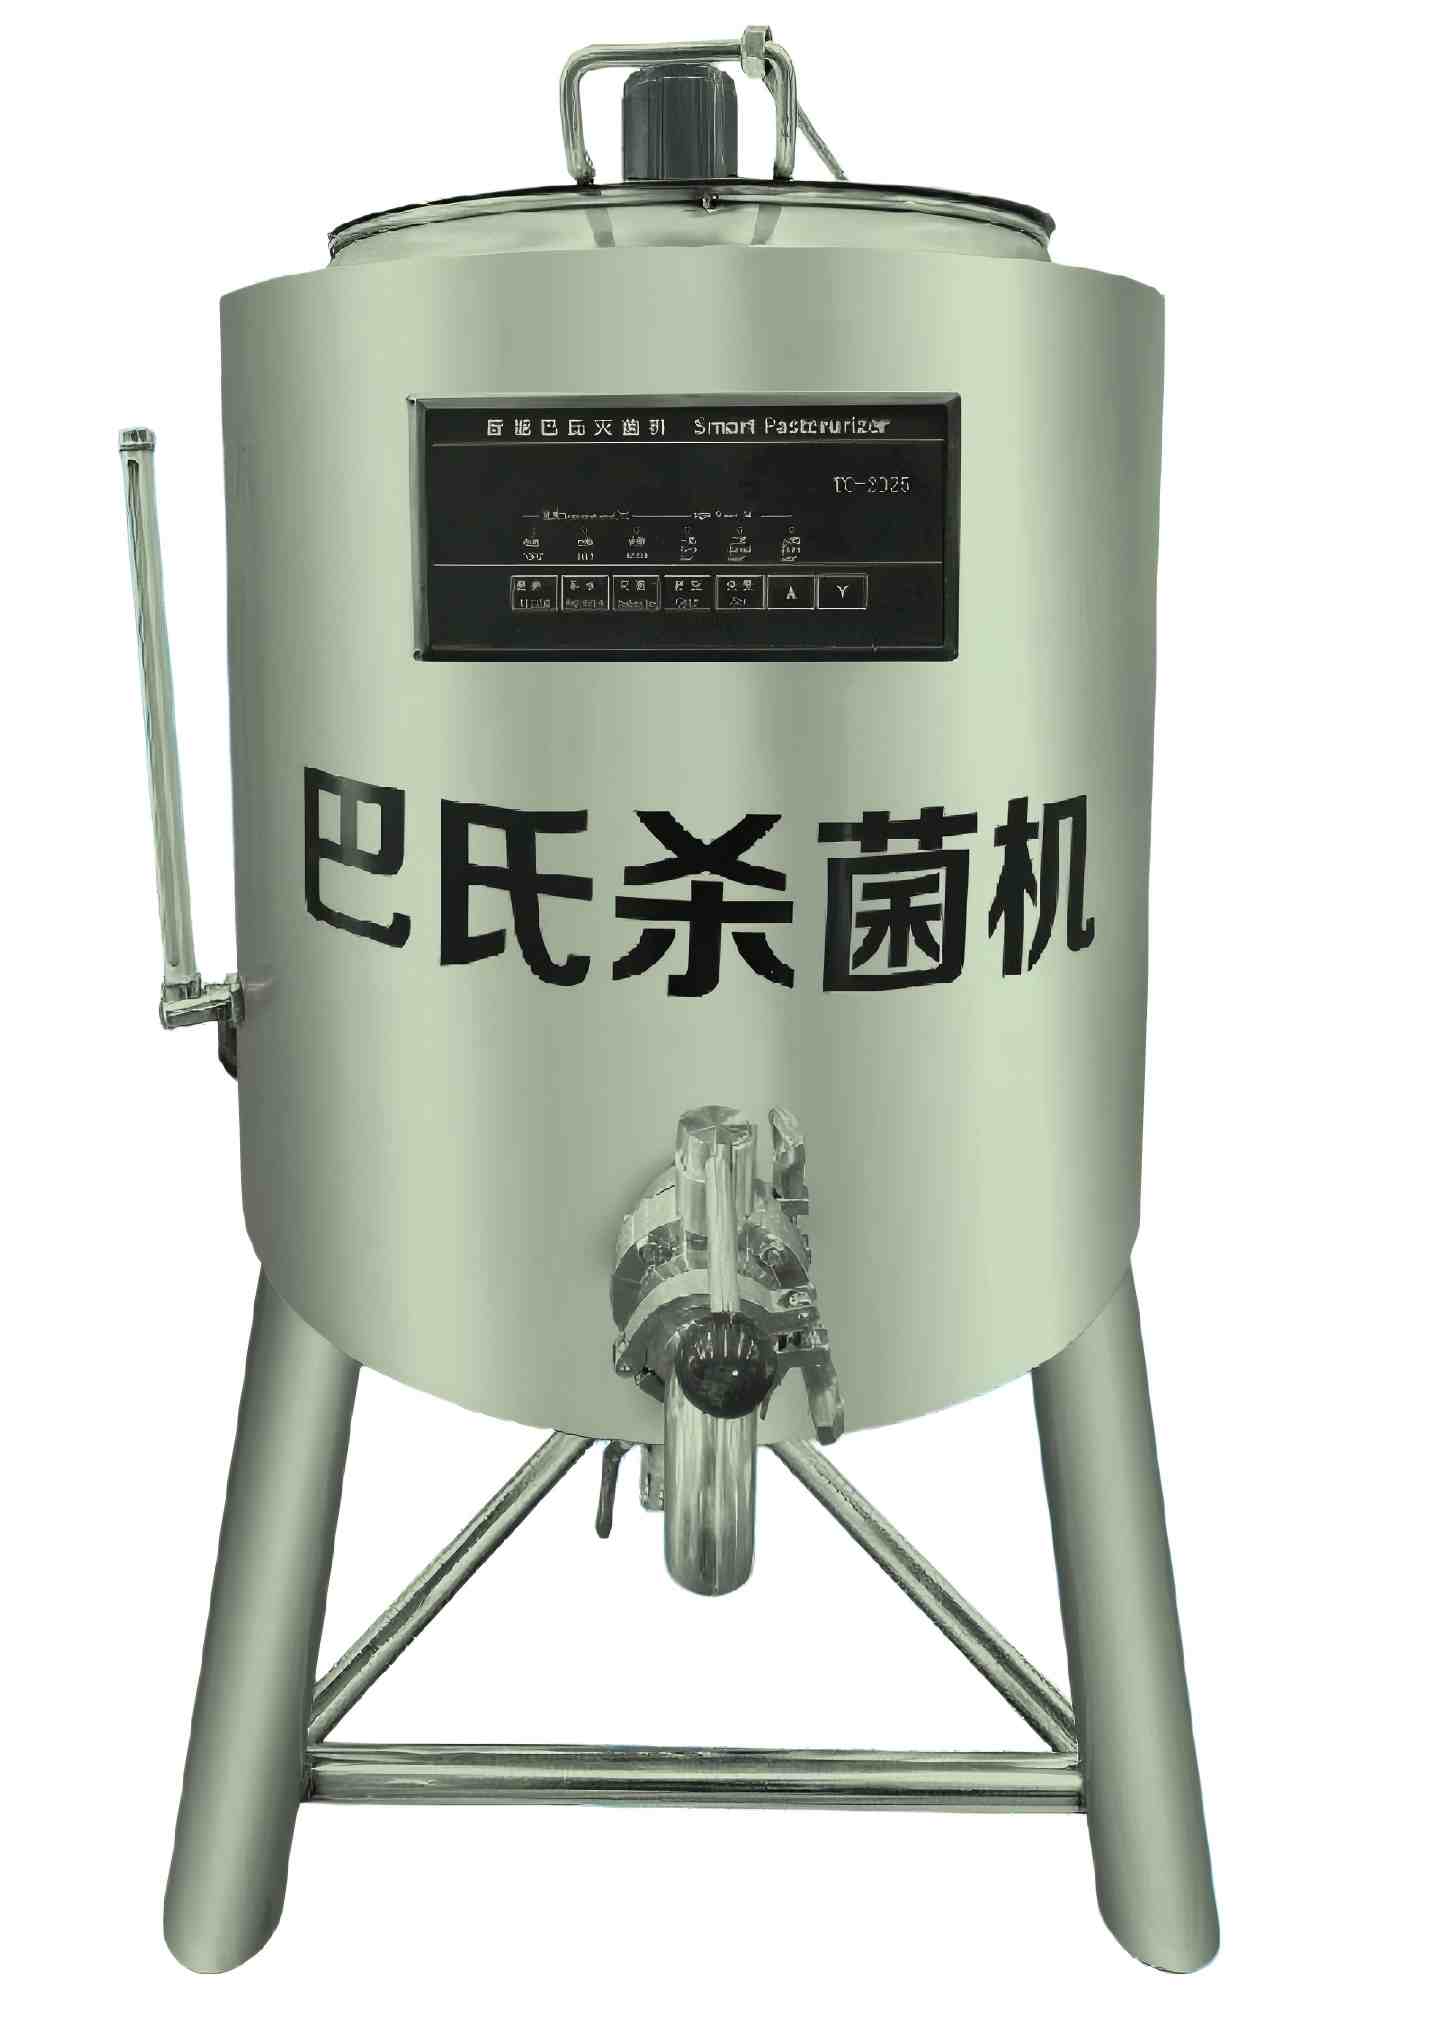
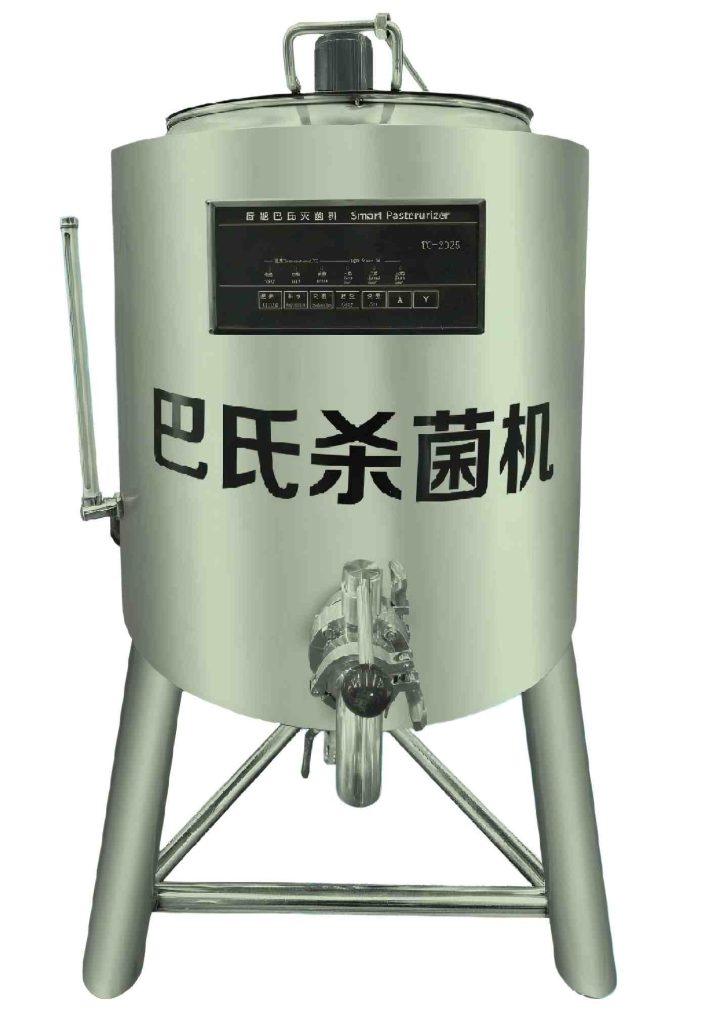
Pasteurizing machine
PRODUCT PARAMETERS
Description
Premium Commercial Milk Pasteurizer – 10L to 1000L Capacity Options
Ensure food safety and extend shelf life with our high-efficiency pasteurization machine, designed for dairy farms, small-scale processors, cafes, and commercial beverage production lines. Built with food-grade stainless steel and precise temperature control, this unit delivers consistent, reliable pasteurization for raw milk, juice, yogurt, and more.
✨ Key Features
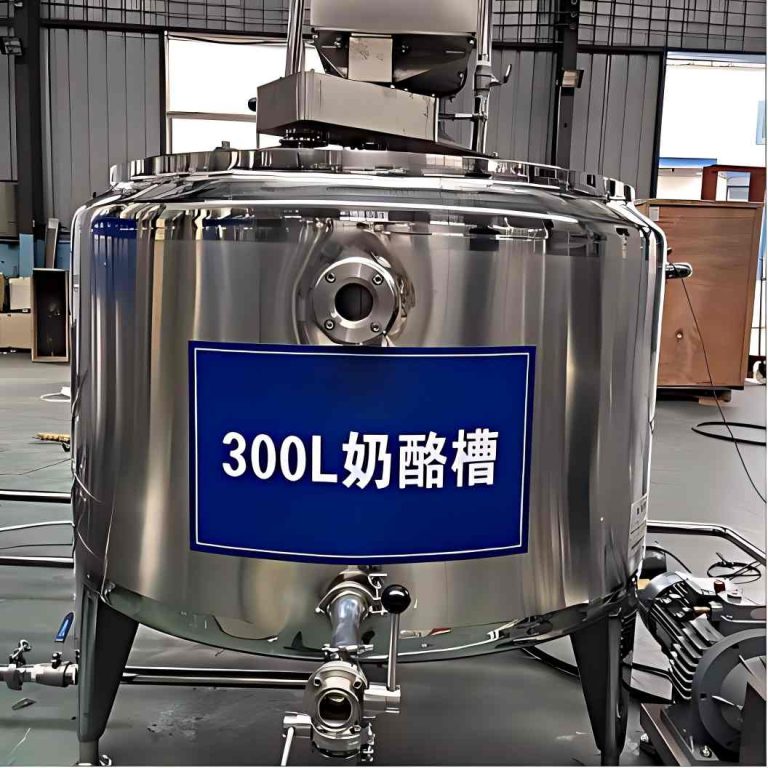
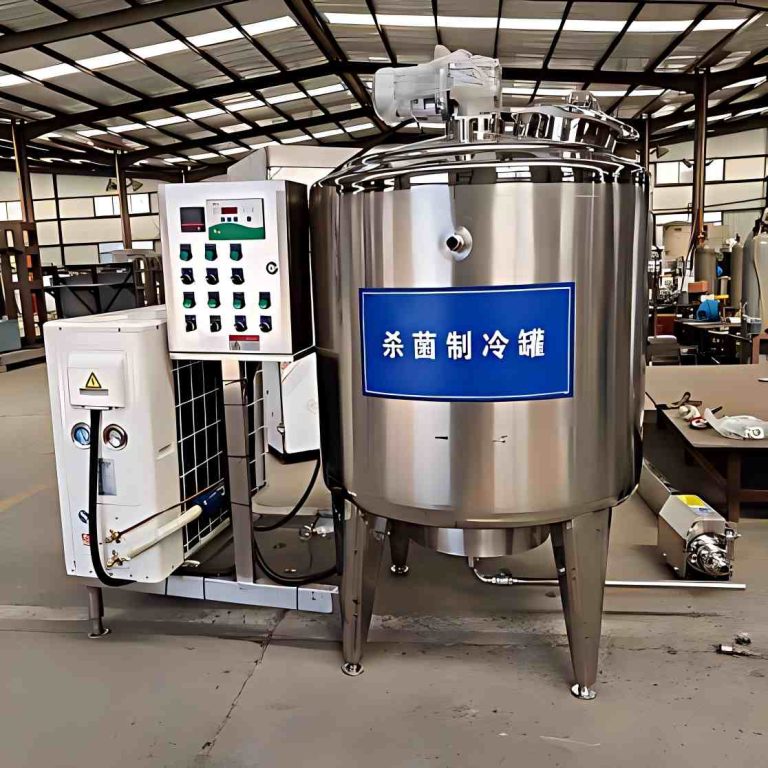
- Multiple Capacity Models: Available in 10L, 30L, 50L, 75L, 100L, 150L, 200L, 250L, 300L, 400L, 500L, 600L, 800L, and 1000L to match your production scale.
- Durable Construction: Made of 304 food-grade stainless steel, the tank is corrosion-resistant, easy to clean, and built for long-term use.
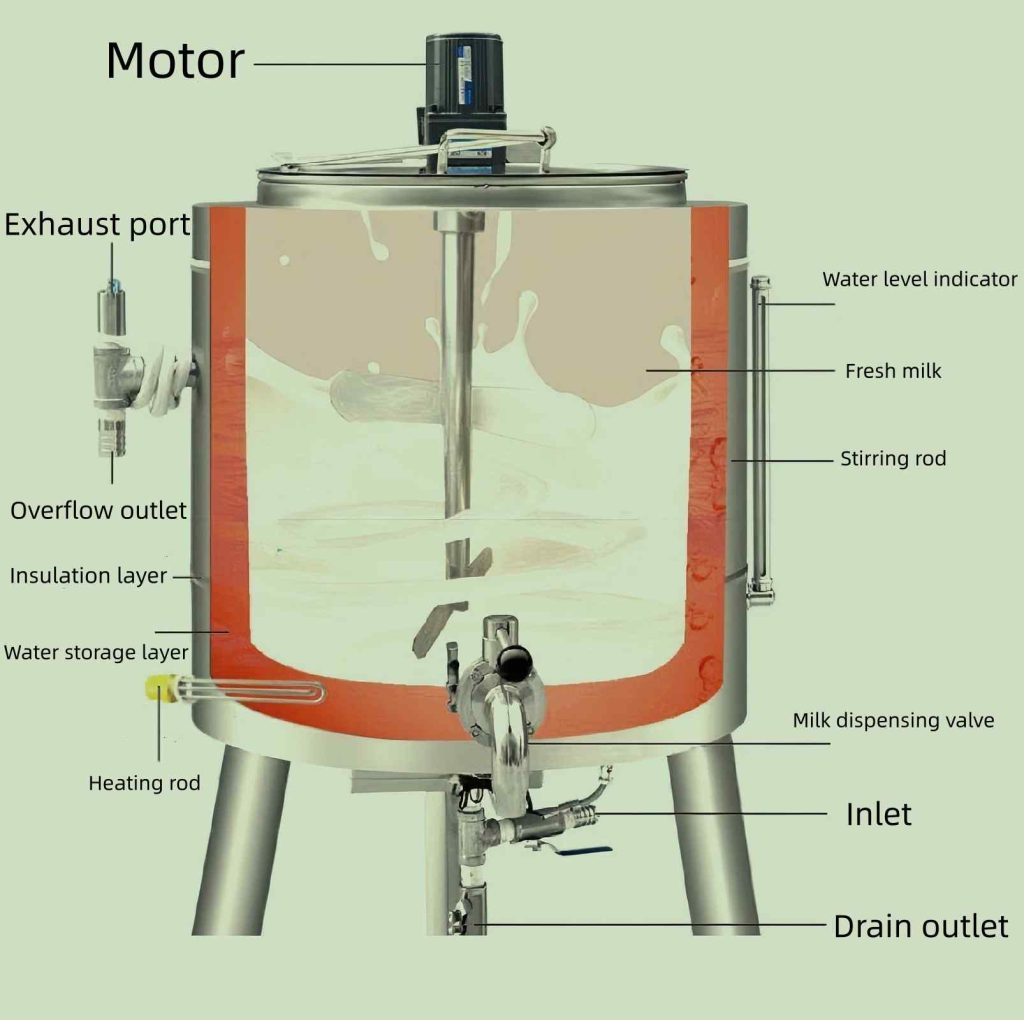
- Precise Control System: Equipped with a motor-driven agitator, heating rod, and water-level indicator for even heating and consistent temperature distribution, eliminating hot spots.
- Flexible Power & Voltage: Models support 220V single-phase or 220/380V three-phase power, with power ratings ranging from 2kW to 48kW to suit different production needs.
- Full Safety Design: Features exhaust ports, overflow outlets, and insulated layers to prevent burns and ensure stable operation. The drain and discharge valves simplify cleaning and product handling.
Pasteurizer parameters
| Capacity (L) | Dimensions (cm) | Power (kW) | Voltage (V) |
| 10 | 38×45×65 | 2 | 220 |
| 30 | 53×51×97 | 6 | 220/380 |
| 50 | 56×57×103 | 6 | 220/380 |
| 75 | 62×63×105 | 6 | 220/380 |
| 100 | 66×67×119 | 9 | 220/380 |
| 150 | 72×75×127 | 9 | 220/380 |
| 200 | 76×78×140 | 24 | 380 |
| 250 | 82×84×145 | 24 | 380 |
| 300 | 91×94×140 | 24 | 380 |
| 400 | 91×94×150 | 36 | 380 |
| 500 | 100×102×166 | 36 | 380 |
| 600 | 111×113×156 | 36 | 380 |
| 800 | 114×112×180 | 36 | 380 |
| 1000 | 123×122×190 | 48 | 380 |
Schematic diagram of a pasteurizer
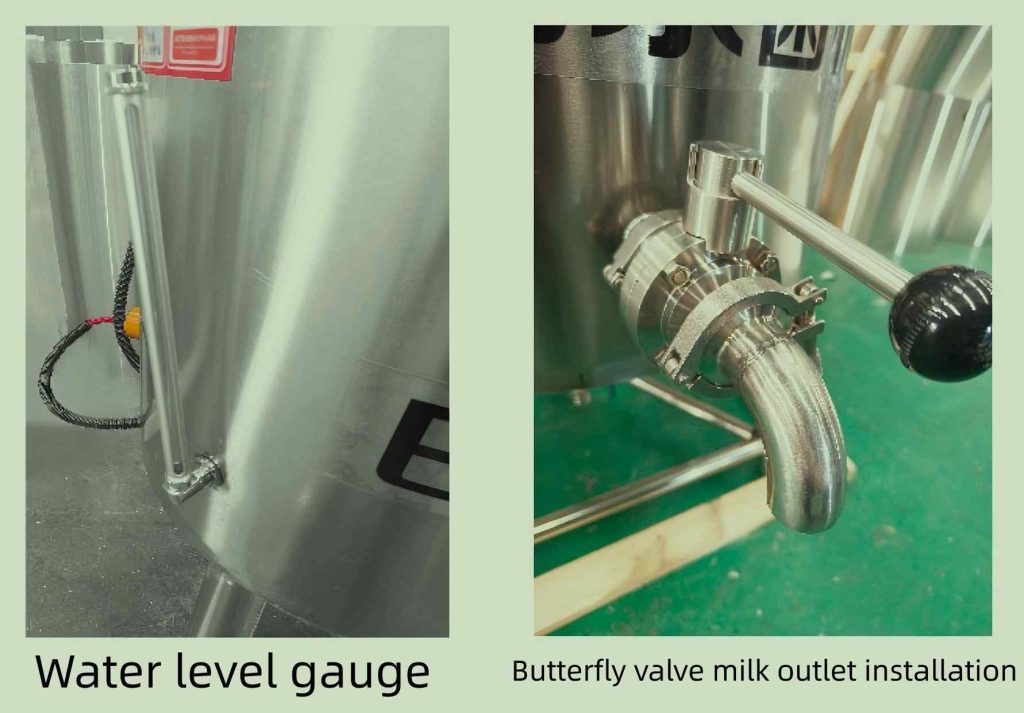
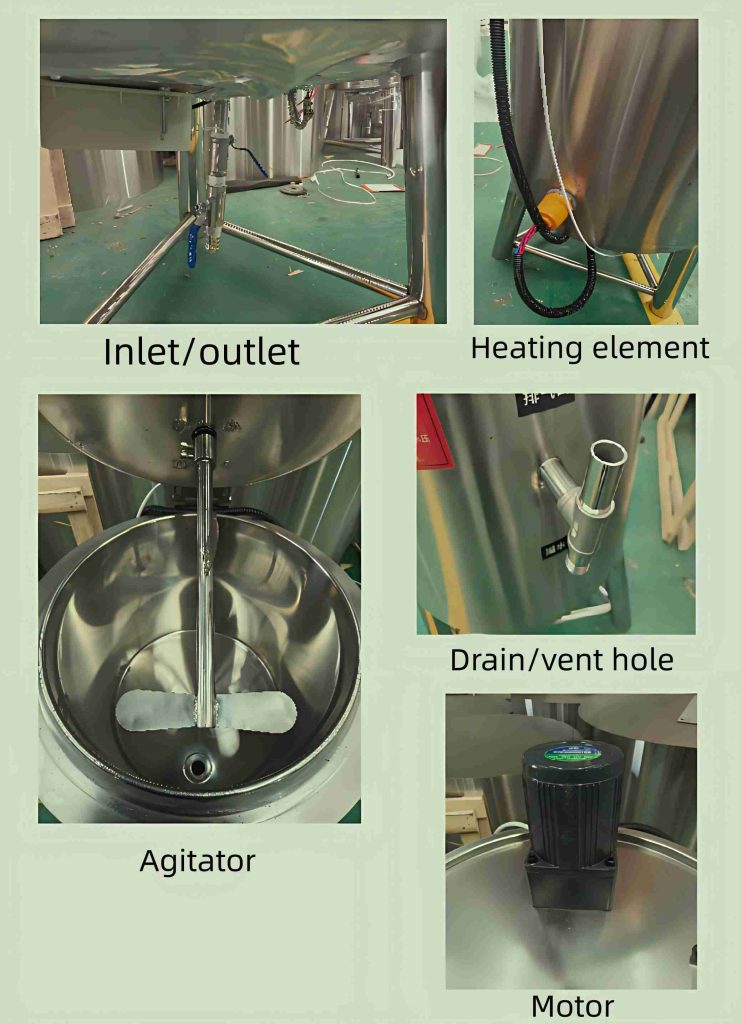
Pasteurizer installation diagram
Machine accessories:
1. Butterfly valve milk outlet 2. Milk outlet gasket 3. Water level tube 4. Spare heating element 5. Spare heating element gasket
Power connection diagram of pasteurizer
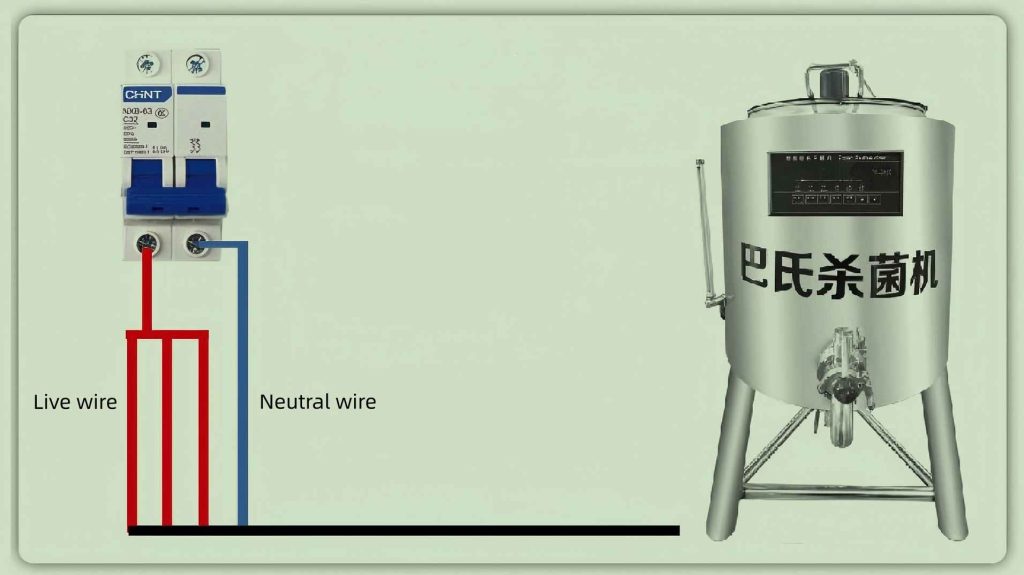
220V wiring method: Twist the three red wires together and connect to the live wire. Connect the blue wire to the neutral wire. Connect to a 63A circuit breaker (with residual current device).
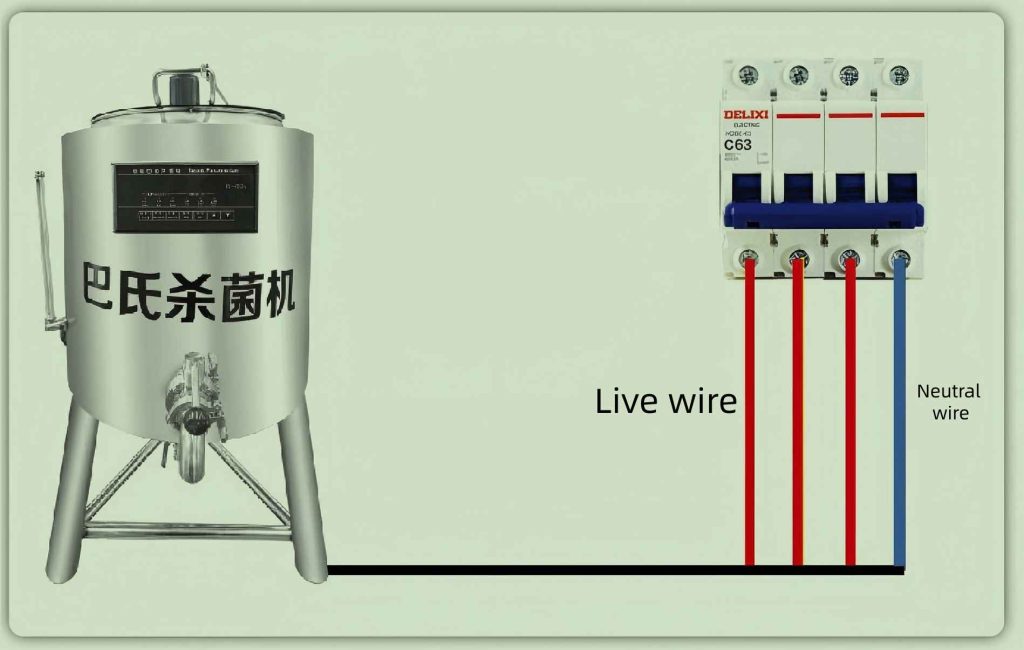
380V wiring method: Connect the three red wires to the live wire. Connect the blue wire to the neutral wire. Connect to a 63A circuit breaker (with residual current device).
Operation panel function introduction
Stirring Function: Pressing the stir button illuminates the stirrer indicator and activates the stirrer motor. Pressing the stir button again turns the stirrer motor off.
Water Replenishment Function: Pressing the water replenishment button illuminates the water replenishment indicator and activates the water replenishment solenoid valve. Pressing the water replenishment button again turns the water replenishment solenoid valve off.
Sterilization Function: Pressing the sterilization button illuminates the sterilization indicator and the heating indicator. Heating begins automatically according to the set temperature.
Heating Level Function: The heating level button controls the heating level, with three levels corresponding to 2kW, 4kW, and 6kW heating power, respectively. The level can be adjusted at any time.
Settings: The setting function only allows setting the heating temperature. Pressing the setting button once will cause the temperature window to flash. Use the up and down keys to adjust the desired temperature, and then press the setting button again to save the temperature setting.
Sterilization Operation Procedure
Step 1: Before powering on, add water to the jacket; the water level gauge should show two-thirds full.
Step 2: Add milk to the container.
Step 3: Turn on the sterilization function. Heat to the set temperature for sterilization, then turn on the agitator (stirring ensures even heating of the milk; if the volume is small, stirring is unnecessary). During sterilization, once the set temperature is reached, an alarm will sound 10 times, after which the temperature will automatically maintain a constant level. If prolonged temperature control is not required, simply turn off the sterilization function.
Usage Precautions:
The machine must not be allowed to run dry!!! The water level indicator must contain water before sterilization can be activated; otherwise, the heating element will burn out. Sterilization must be turned off when draining water!!! The water in the inner tank must be changed regularly to prevent scale buildup and extend the lifespan of the heating element. Wiring Method: For 380V, the blue wire is the neutral wire, and the red, green, and yellow wires are connected to the live wires respectively. For 220V, the blue wire is the neutral wire, and the red, green, and yellow wires are twisted together and connected to the live wire.
FAQs
What types of products can we offer?
Make amazing 60 degree bevel cuts with our 8-1/4 in. SKILSAW Worm Drive model SPT78W-01. This saw is powered by our largest 15 amp Dual-Field high torque motor so you will make the last cut as precisely as you did the first cut. Exclusive 60 degree bevel. High torque Dual-Field motor. Legendary SKILSAW durability. Includes: SPT78W 8-1/4 In. Worm Drive SKILSAW, 24 Tooth Carbide blade and multi-functional blade wrench.

What logistics do we ship through?
Make amazing 60 degree bevel cuts with our 8-1/4 in. SKILSAW Worm Drive model SPT78W-01. This saw is powered by our largest 15 amp Dual-Field high torque motor so you will make the last cut as precisely as you did the first cut. Exclusive 60 degree bevel.


Can it be customized as per our requirements?

Make amazing 60-degree bevel cuts with our 8-1/4 in. SKIL Worm Drive Skilsaw model SPT78W-01. This Skilsaw is powered by our largest 15 amp Dual-Field™ high torque motor so you will make the last cut as precisely as you did the first cut. Exclusive 60-degree bevel. High torque Dual-Field™motor. Legendary SKIL durability.
What is our ordering process?
Shenguan is a direct seller of CATL, LISHEN, EVE, GOTION, Narada, TAFEL, CALB, REPT and other batteries. We have fresh stock, ready for shipment. Support ODM&OEM, please contact the store customer service to provide customized requirements.
What services are included in the after-sales service?
- This saw is powered by our largest 15 amp Dual-Field
- High torque motor so you will make the last cut as precisely as you did the first cut.
- Exclusive 60 degree bevel. High torque Dual-Field motor. Legendary SKILSAW durability.
- Includes: SPT78W 8-1/4 In. Worm Drive SKILSAW, 24 Tooth Carbide blade and multi-functional blade wrench.